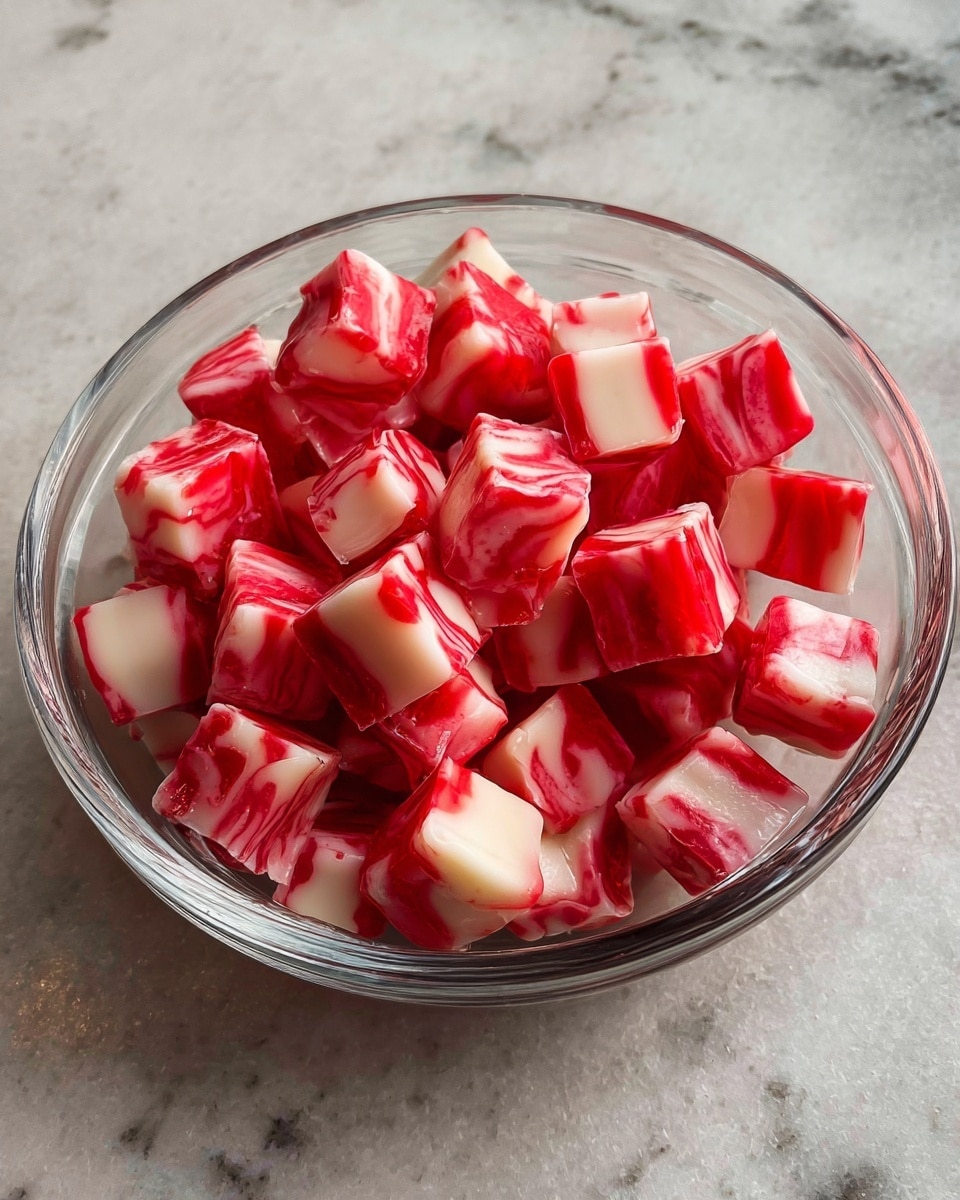
If you’re searching for a festive, melt-in-your-mouth treat to delight your friends and family, look no further than this Soft Christmas Peppermints (Easy Butter Mints) Recipe. These charming little candies boast a perfect balance of creamy butter, smooth powdered sugar, and refreshing peppermint flavor, presented in a delightful red-and-white twist that instantly brings holiday cheer. Whether you’re new to candy-making or a seasoned veteran, this recipe is as approachable as it is delicious, making it a perfect addition to your seasonal sweets lineup.
Ingredients You’ll Need

Let’s start by gathering a handful of simple, everyday ingredients that work together beautifully to create the flavor, texture, and festive look of these soft Christmas peppermints. Each element plays a crucial role in crafting that irresistible melt-in-your-mouth softness and classic peppermint zing.
- Butter (1/2 cup): Using room temperature butter ensures the mints blend smoothly and stay soft.
- Powdered sugar (4 cups): This gives the candy its sweet base and smooth texture without graininess.
- Heavy whipping cream (2 tablespoons): Adds richness and helps achieve a creamy consistency for easy shaping.
- Peppermint extract (1/4 teaspoon): The heart of the recipe, infusing each bite with refreshing peppermint flavor – adjust to your taste!
- Red coloring gel: Adds vibrant holiday color without impacting texture or taste.
How to Make Soft Christmas Peppermints (Easy Butter Mints) Recipe
Step 1: Prepare Your Workspace
Before diving in, clear your countertop and lay down parchment paper, waxed paper, or a baking mat. This surface will keep your candies from sticking and give you a clean area to work, especially when rolling and twisting the mints. Have extra powdered sugar nearby to dust your hands or rolling area if needed.
Step 2: Cream the Butter
Place your softened butter in a large bowl and beat it until it becomes light and fluffy. This step is essential for creating that silky texture that makes these butter mints so soft and luxurious.
Step 3: Combine Ingredients
Add the heavy whipping cream, powdered sugar, and peppermint extract to the butter. Mix everything together thoroughly until the dough reaches a firm but pliable consistency that you can easily roll and shape without it sticking excessively to your hands.
Step 4: Divide and Color the Dough
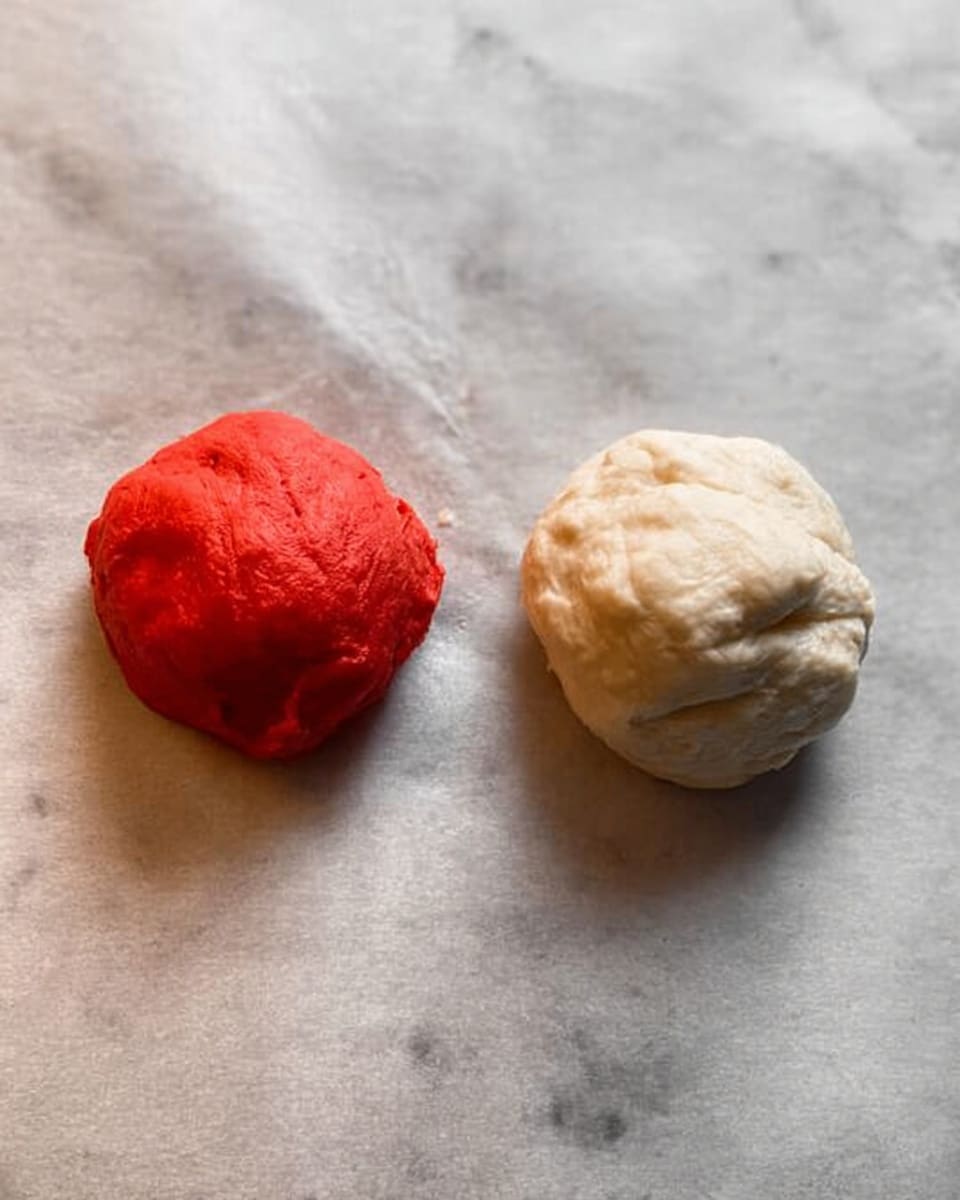
Split your mint dough into two portions—about one-quarter and three-quarters of the batch. Color the smaller portion red using the coloring gel; leave the larger portion white. Roll each into smooth balls and set aside. This coloring step gives the candy its classic Christmas look and makes the twists so eye-catching.
Step 5: Twist the Mints
Take small amounts of each color dough and roll them into ropes—make the red rope thinner than the white one. Place these ropes side by side and twist them gently together, creating that lovely candy cane swirl effect. Work quickly to keep the dough soft and easy to manipulate.
Step 6: Shape and Dry
Pinch off small sections from the twisted rope, then roll them between your palms to smooth out the edges. Lay these on your prepared surface to dry. Allow the ribbons to rest for about an hour or two so they become less sticky before cutting.
Step 7: Cut and Cure
Once slightly firm, slice the ropes into individual peppermint pieces using a pizza cutter for clean edges. Spread the candies out on the wax paper and leave them at room temperature for 24 hours to fully dry and develop that perfect tender bite.
Step 8: Store Your Peppermints
After the full drying period, transfer your soft Christmas peppermints to an airtight container. Refrigeration isn’t necessary but feel free to chill them if you prefer a cooler treat. This ensures the candies remain fresh and soft for days.
How to Serve Soft Christmas Peppermints (Easy Butter Mints) Recipe

Garnishes
These soft Christmas peppermints look stunning sprinkled with a little powdered sugar or crushed candy canes. Adding a light dusting just before serving amps up their festive appeal with a bit of sparkle and texture contrast.
Side Dishes
Serve these buttery mints alongside holiday cookies or with a warm cup of cocoa to create a cozy and indulgent dessert table. Their cool peppermint flavor perfectly complements sweet, richer treats and warming beverages.
Creative Ways to Present
For gifting or decoration, arrange the mints in clear jars with ribbons or place them on decorative holiday trays. You can even thread them onto skewers for edible holiday “sticks” that double as party favors or stylish table accents.
Make Ahead and Storage
Storing Leftovers
The soft Christmas peppermints keep beautifully in an airtight container at room temperature for up to two weeks. Just make sure they stay dry and away from humidity to maintain their texture.
Freezing
If you want to keep them longer, freezing is an option. Place them in a single layer on a baking sheet, freeze until firm, then transfer to a freezer-safe bag or container. Thaw at room temperature when ready to enjoy.
Reheating
These mints are best served at room temperature, so let frozen mints sit out for 15 to 20 minutes before eating. Avoid heating them in the microwave, which can affect their texture.
FAQs
Can I use other food colorings besides red gel?
Absolutely! While red is traditional for Christmas, you can use any color gel you like to personalize your mints. Just use gel-based color for best results as it won’t alter the dough’s consistency.
Can these butter mints be made without butter?
Butter is a key ingredient for softness and flavor in this recipe, so replacing it will change the texture significantly. For a similar softness and taste, butter is highly recommended.
Is it possible to make these mints vegan?
This recipe relies on butter and heavy cream, both dairy products. To make a vegan version, you would need to experiment using plant-based butter and cream substitutes, but the results may vary.
How can I adjust the peppermint flavor?
You can increase or decrease the peppermint extract to suit your preferences. Start with 1/4 teaspoon and add more if you want a stronger minty kick.
Do the mints harden over time?
Not at all. When stored properly, these butter mints remain soft and tender, unlike hard candy varieties. The cream and butter keep the texture smooth and pleasant.
Final Thoughts
Making these Soft Christmas Peppermints (Easy Butter Mints) Recipe is such a joy, from mixing the buttery dough to twisting the bright red and white ropes. They bring an old-fashioned charm to any holiday gathering, and their delicate peppermint flavor truly captures the spirit of the season. I can’t wait for you to try making them yourself—they’re sure to become a beloved tradition in your holiday celebrations!
PrintSoft Christmas Peppermints (Easy Butter Mints) Recipe
These Soft Christmas Peppermints are easy-to-make butter mints perfect for holiday gifting and celebrations. With a smooth, melt-in-your-mouth texture and festive red and white swirls, these candies combine buttery richness with refreshing peppermint flavor in colorful twisted ropes.
- Prep Time: 10 minutes
- Cook Time: 0 minutes
- Total Time: 30 minutes plus 24 hours drying time
- Yield: Approximately 100 servings
- Category: Candy
- Method: No-Cook
- Cuisine: American
Ingredients
Ingredients
- 1/2 cup butter, room temperature
- 4 cups powdered sugar
- 2 tablespoons heavy whipping cream
- 1/4 teaspoon peppermint extract (adjust to taste)
- Red coloring gel (or food coloring)
Instructions
- Prepare Work Surface: Lay out parchment paper, waxed paper, or a baking mat to use as your workspace; have extra powdered sugar nearby for dusting while rolling the dough.
- Beat Butter: Place room temperature butter in a large mixing bowl and beat until it becomes light and fluffy, which helps create a smooth candy base.
- Add Ingredients: Incorporate heavy whipping cream, powdered sugar, and peppermint extract into the butter. Mix thoroughly until you achieve a firm dough consistency.
- Divide and Color Dough: Split the dough into two portions. Color about one-quarter of it with red coloring gel, leaving the remaining three-quarters plain white. Shape each portion into balls and set aside.
- Form Twists: Roll smaller ropes of red dough alongside thicker ropes of white dough. Twist the two ropes carefully together to create a festive spiral effect.
- Roll and Smooth: Pinch off smaller sections of the twisted rope and roll them between your palms to smooth and shape the candies evenly.
- Dry the Candy: Place the twisted ropes on wax paper and allow them to dry for about 1 to 2 hours until they’re less sticky and firm enough to cut.
- Cut Candy Pieces: Using a pizza cutter, slice the dried ropes into bite-sized peppermint pieces. Waiting for the candy to dry reduces stickiness and eases cutting.
- Final Drying: Leave the cut pieces out for 24 hours to complete the drying process, ensuring they firm up properly.
- Store the Candy: After drying, store the peppermint candies in an airtight container. Refrigeration is optional but not required.
Notes
- Use room temperature butter for easy mixing and fluffy texture.
- Adjust the peppermint extract amount to your preference for stronger or milder mint flavor.
- Extra powdered sugar helps prevent sticking while rolling the dough.
- The candies firm up better after drying for 24 hours, so patience improves texture.
- Red coloring gel provides vibrant color without affecting texture; adjust color intensity as desired.
- These mints keep well at room temperature and do not need refrigeration unless preferred.


