Why You’ll Love This Recipe
Honey Cake Medovik is an elegant, layered dessert that’s perfect for special occasions like weddings or any celebration! This Russian and Ukrainian classic is soft, moist, and bursting with the sweet flavor of honey. With its eight delicate layers and simple four-ingredient sour cream filling, this cake is as impressive as it is delicious. The slight tang of sour cream balances out the sweetness, making each bite an unforgettable experience. Despite the time and effort it takes, the result is absolutely worth it!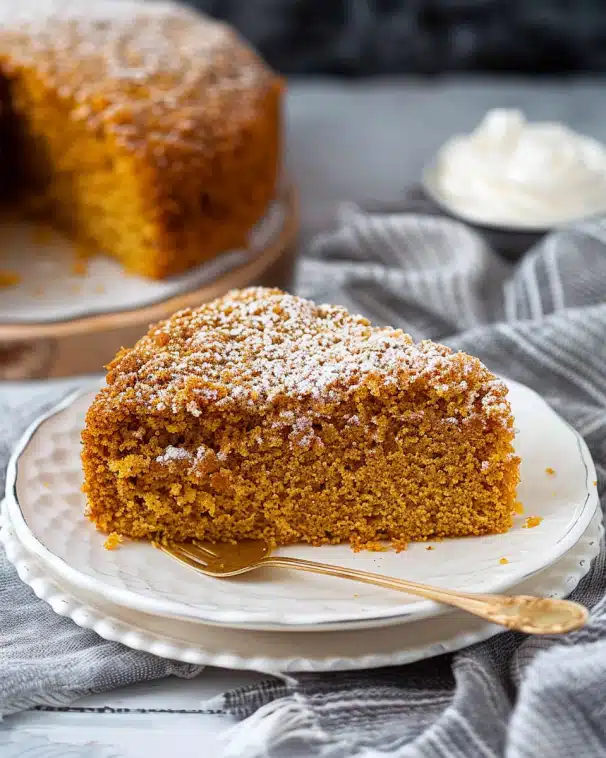
Ingredients
For the Cake Layers:
-
3 large eggs (room temperature)
-
1/2 cup honey
-
1/2 cup granulated sugar
-
3 tablespoons unsalted butter
-
1/8 teaspoon sea salt
-
1 teaspoon baking soda
-
4 cups all-purpose flour (480g, more if needed)
For the Filling:
-
3 cups sour cream (cold)
-
1 cup powdered sugar
-
1 teaspoon pure vanilla extract
-
2 cups heavy whipping cream (cold)
For the Border and Bees (optional):
-
4 oz cream cheese (softened)
-
1/2 cup powdered sugar
-
1/2 teaspoon pure vanilla extract
-
1 cup heavy whipping cream (cold)
-
Yellow gel food coloring (as needed)
-
Black gel food coloring (as needed)
-
2 tablespoons sliced almonds (for bee wings)
Directions
-
Prepare the Cake Layers:
-
Preheat the oven to 350°F (180°C) and line a large baking sheet or pizza pan with parchment paper.
-
In a saucepan, combine honey, sugar, and butter. Heat on medium-low until it simmers, then remove from heat.
-
Add salt and baking soda, whisking vigorously until combined. The mixture will foam up a bit.
-
Gradually pour the whisked eggs into the hot honey mixture, whisking constantly to avoid scrambling the eggs.
-
Sift in the flour and fold the mixture with a spatula until the dough forms. The dough should be thick like cookie dough.
-
While the dough is still warm, turn it out onto a floured surface and divide it into 8 equal portions. Roll each portion into a ball.
-
-
Roll and Bake the Layers:
-
Roll each dough ball into a 9-inch circle. Use an 8-inch round pan to trace and cut out the circle.
-
Transfer each circle onto the prepared baking sheet and bake for 4-5 minutes, or until golden. Keep an eye on them as they can burn quickly.
-
Repeat for the remaining dough balls, allowing the baked layers to cool on a rack.
-
-
Make the Filling:
-
Chill a mixing bowl or stand mixer bowl in the freezer for 5-10 minutes.
-
Whip the heavy cream in the chilled bowl until medium-stiff peaks form.
-
Add the sour cream, powdered sugar, and vanilla extract, and continue whipping until stiff peaks form. Be careful not to overwhip to avoid a grainy texture.
-
-
Assemble the Cake:
-
On a cake stand or large plate, start by spreading a thin layer of filling on the base.
-
Place the first cake layer and spread about a third of a cup of the filling over it.
-
Continue layering the cake and filling until all layers are used, leaving some filling for the sides.
-
Cover the sides of the cake with the remaining filling. If the cake begins to lean, insert skewers or chopsticks to help hold it in place.
-
Refrigerate the cake overnight for the layers to absorb the filling.
-
-
Decorate the Cake (Optional):
-
Make the border and bee decorations by mixing cream cheese, vanilla extract, powdered sugar, and whipping the cream to stiff peaks.
-
Separate the frosting into two portions: one for the yellow food coloring and one for the black.
-
Pipe a rope border on top of the cake using white frosting, then pipe yellow bodies and black stripes for the bees. Add sliced almonds for the bee wings.
-
Decorate the cake as desired with the bees and borders.
-
-
Serve:
-
Slice and serve chilled. This cake is best enjoyed after it has rested and absorbed the moisture from the filling overnight.
-
Servings and Timing
-
Servings: 12 servings
-
Preparation Time: 1 hour
-
Cooking Time: 30 minutes
-
Chilling Time: 8 hours (overnight is ideal)
-
Total Time: 9 hours 30 minutes (including chilling time)
Variations
-
Flavored Filling: You can experiment with flavored extracts like almond or hazelnut for a twist on the traditional filling.
-
Chocolate Drizzle: For an extra indulgent treat, drizzle melted chocolate over the top before decorating with bees.
-
Nutty Layers: Add a sprinkle of finely chopped walnuts or hazelnuts between the layers for extra crunch.
Storage/Reheating
-
Storage: Store the Honey Cake in the refrigerator due to the sour cream filling. It will stay fresh for up to 3-4 days.
-
Freezing: You can freeze the assembled cake, but it’s best to freeze it before the decoration. Allow it to thaw in the refrigerator before serving.
FAQs
-
Can I make this cake ahead of time?
Yes, it’s actually better if you make the cake ahead of time! Chilling overnight allows the layers to absorb the moisture from the filling, which enhances the flavor and texture. -
Can I use something other than sour cream for the filling?
You can substitute the sour cream with thick Greek yogurt for a slightly tangy flavor, or use mascarpone cheese for a creamier texture. -
What if I don’t have time to make the decorations?
The cake is beautiful and delicious without the border and bees, so feel free to skip the decorations if you’re in a hurry.
Conclusion
Honey Cake Medovik is a truly special dessert that combines the rich flavors of honey and sour cream with a delicate, multi-layered texture. While it requires a bit of patience to make, the result is absolutely worth it. Whether you’re making it for a wedding, a birthday, or just a treat for your family, this cake will impress everyone with its elegance and unique flavor. Don’t forget to refrigerate overnight for the best results!
PrintRussian Honey Cake (Medovik)
Honey Cake Medovik is an elegant, layered dessert that’s perfect for special occasions like weddings or any celebration! This Russian and Ukrainian classic is soft, moist, and bursting with the sweet flavor of honey. With its eight delicate layers and simple four-ingredient sour cream filling, this cake is as impressive as it is delicious. The slight tang of sour cream balances out the sweetness, making each bite an unforgettable experience. Despite the time and effort it takes, the result is absolutely worth it!
- Prep Time: 60 minutes
- Cook Time: 30 minutes
- Total Time: 8 hours
- Yield: 12 servings
- Category: Dessert
- Method: Baking
- Cuisine: Russian, Ukrainian
- Diet: Vegetarian
Ingredients
For the Cake Layers:
3 large eggs (room temperature)
1/2 cup honey
1/2 cup granulated sugar
3 tablespoons unsalted butter
1/8 teaspoon sea salt
1 teaspoon baking soda
4 cups all-purpose flour (480g, more if needed)
For the Filling:
3 cups sour cream (cold)
1 cup powdered sugar
1 teaspoon pure vanilla extract
2 cups heavy whipping cream (cold)
For the Border and Bees (optional):
4 oz cream cheese (softened)
1/2 cup powdered sugar
1/2 teaspoon pure vanilla extract
1 cup heavy whipping cream (cold)
Yellow gel food coloring (as needed)
Black gel food coloring (as needed)
2 tablespoons sliced almonds (for bee wings)
Instructions
-
Prepare the Cake Layers:
Preheat the oven to 350°F (180°C) and line a large baking sheet or pizza pan with parchment paper.In a saucepan, combine honey, sugar, and butter. Heat on medium-low until it simmers, then remove from heat. Add salt and baking soda, whisking vigorously until combined. The mixture will foam up a bit.
Gradually pour the whisked eggs into the hot honey mixture, whisking constantly to avoid scrambling the eggs.
Sift in the flour and fold the mixture with a spatula until the dough forms. The dough should be thick like cookie dough.
-
Roll and Bake the Layers:
While the dough is still warm, turn it out onto a floured surface and divide it into 8 equal portions. Roll each portion into a ball. Roll each dough ball into a 9-inch circle. Use an 8-inch round pan to trace and cut out the circle.Transfer each circle onto the prepared baking sheet and bake for 4-5 minutes, or until golden. Keep an eye on them as they can burn quickly. Repeat for the remaining dough balls, allowing the baked layers to cool on a rack.
-
Make the Filling:
Chill a mixing bowl or stand mixer bowl in the freezer for 5-10 minutes. Whip the heavy cream in the chilled bowl until medium-stiff peaks form. Add the sour cream, powdered sugar, and vanilla extract, and continue whipping until stiff peaks form. Be careful not to overwhip to avoid a grainy texture. -
Assemble the Cake:
On a cake stand or large plate, start by spreading a thin layer of filling on the base. Place the first cake layer and spread about a third of a cup of the filling over it. Continue layering the cake and filling until all layers are used, leaving some filling for the sides.Cover the sides of the cake with the remaining filling. If the cake begins to lean, insert skewers or chopsticks to help hold it in place. Refrigerate the cake overnight for the layers to absorb the filling.
-
Decorate the Cake (Optional):
Make the border and bee decorations by mixing cream cheese, vanilla extract, powdered sugar, and whipping the cream to stiff peaks. Separate the frosting into two portions: one for the yellow food coloring and one for the black.Pipe a rope border on top of the cake using white frosting, then pipe yellow bodies and black stripes for the bees. Add sliced almonds for the bee wings. Decorate the cake as desired with the bees and borders.
-
Serve:
Slice and serve chilled. This cake is best enjoyed after it has rested and absorbed the moisture from the filling overnight.
Notes
-
Storage: Store the Honey Cake in the refrigerator due to the sour cream filling. It will stay fresh for up to 3-4 days.
-
Freezing: You can freeze the assembled cake, but it’s best to freeze it before the decoration. Allow it to thaw in the refrigerator before serving.
-
Variations:
-
Flavored Filling: You can experiment with flavored extracts like almond or hazelnut for a twist on the traditional filling.
-
Chocolate Drizzle: For an extra indulgent treat, drizzle melted chocolate over the top before decorating with bees.
-
Nutty Layers: Add a sprinkle of finely chopped walnuts or hazelnuts between the layers for extra crunch.
-

![Easy Snowball Cookies [Various Flavors] Recipe](https://cheftinaskitchen.com/wp-content/uploads/2025/11/0_1-1762853517184-768x960.jpeg)
