If you’ve ever craved that perfect bite of crunchy, creamy, and spicy all wrapped into one unforgettable dish, then this Restaurant-Worthy Spicy Tuna Crispy Rice At Home! Recipe is your new kitchen obsession. Imagine perfectly fried crispy rice squares topped with a luscious mixture of fresh ahi tuna, spicy mayo, and tangy ponzu—all melding into an explosion of texture and flavor that will have your friends begging for the secret. It’s genuinely incredible how you can create this stunning restaurant experience right in your own home with just a handful of thoughtful ingredients and a bit of patience.
Ingredients You’ll Need

This recipe relies on a handful of simple yet essential ingredients that each bring their own magic to the plate. The sushi rice forms the crispy foundation, while fresh ahi tuna delivers melt-in-your-mouth goodness. The spicy mayo and ponzu introduce heat and brightness, and a quick fry transforms humble rice into a golden, crunchy delight.
- 1 cup sushi rice: Short grain rice is key for stickiness and the perfect crispy texture after frying.
- 2 Tbsp rice vinegar: Adds that authentic sushi tang and helps balance sweetness.
- 1½ tsp granulated sugar: Balances the vinegar with a touch of sweetness.
- ½ tsp Kosher salt: Enhances all the other flavors.
- ½ cup grapeseed oil: Ideal for frying with a neutral flavor and high smoke point.
- ½ lb sushi-grade ahi tuna: Freshness matters—choose sashimi-grade for safety and taste.
- 3 scallions: Thinly sliced for mild onion flavor and a pop of color.
- 1 jalapeño: Sliced thinly; adds a fresh, bright heat for garnish.
- Black sesame seeds: For a nutty crunch and visual appeal.
- ½ cup Kewpie mayonnaise: Creamy and slightly sweet mayo that elevates the spicy tuna mixture.
- ¼ cup Sriracha: Brings the perfect spicy kick with flavor.
- 3 Tbsp ponzu sauce: Citrus-soy sauce that brightens and deepens the umami notes.
How to Make Restaurant-Worthy Spicy Tuna Crispy Rice At Home! Recipe
Step 1: Cook and Season the Rice
Start by rinsing the sushi rice under cool water until the water runs clear, which removes excess starch and prevents clumping. Cook the rice according to package instructions or with a rice cooker for perfect texture. Meanwhile, make your sushi vinegar by simmering rice vinegar, sugar, and salt until dissolved. Once the rice is cooked, gently fold in your sushi vinegar while the rice is still warm—this step ensures every grain is flavorful and authentic. Then press your seasoned rice evenly into a lined pan and chill for at least 3 hours to firm up. This cooling step is crucial for shaping and getting that satisfying crispy exterior.
Step 2: Prepare the Spicy Tuna Mixture
While the rice chills, finely chop your sushi-grade ahi tuna until it’s almost paste-like but still with a bit of texture. Toss it into a bowl with thinly sliced scallions for a subtle fresh bite. Now whisk together Kewpie mayonnaise, Sriracha, and ponzu sauce to create a spicy, creamy, and tangy dressing. Combine this with the tuna, mix thoroughly, and refrigerate until you’re ready to assemble the dish. This mixture is where the bold and dynamic flavor kicks in, so make sure to taste and adjust any seasoning.
Step 3: Fry the Crispy Rice
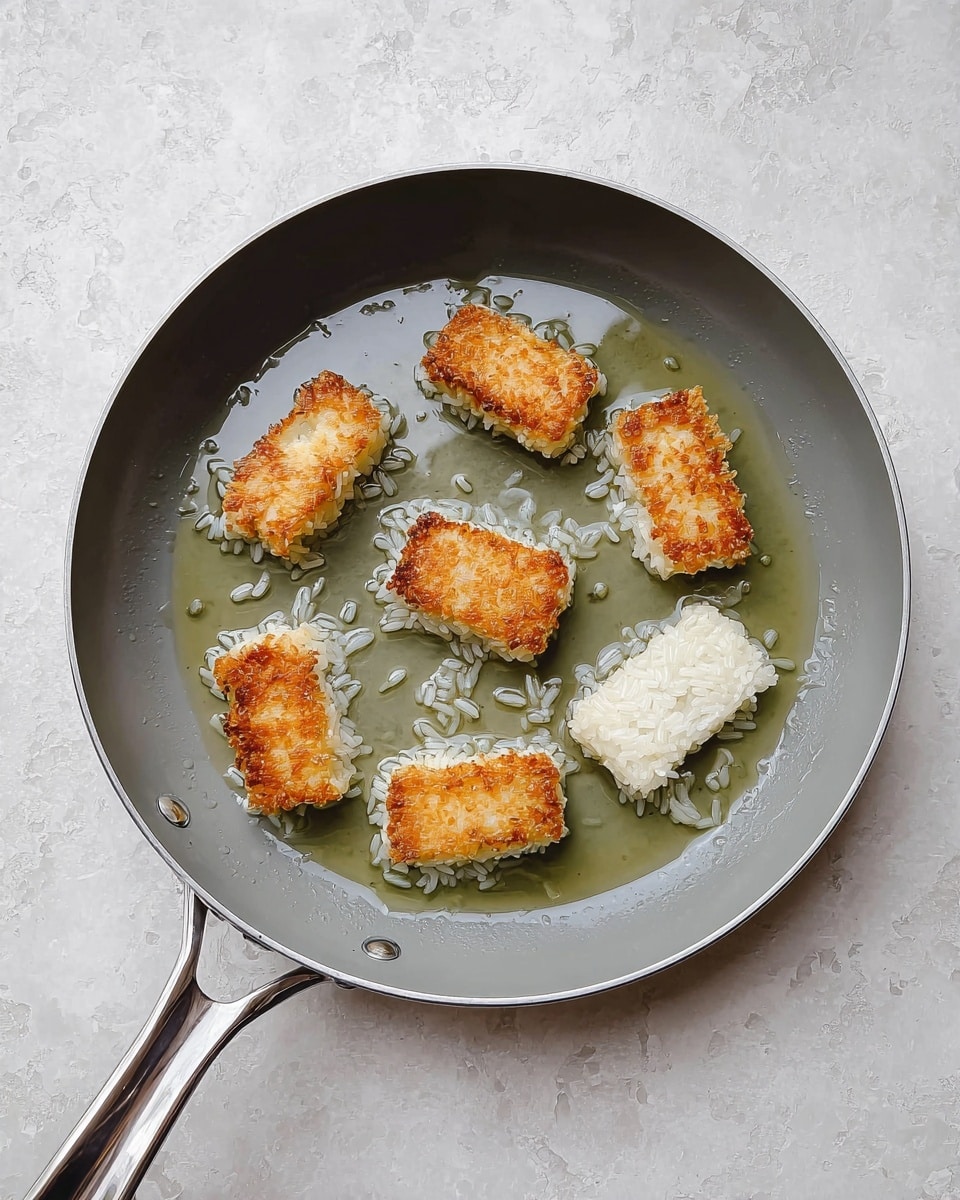
Next, heat a thin layer of grapeseed oil in a large skillet over medium heat—just enough to coat the bottom of the pan. Cut your chilled rice into neat 2-inch by ¾-inch rectangles, wetting your hands or the knife to prevent sticking. Fry the rice pieces in batches, about 2 minutes per side, until each side develops a golden, crispy crust that provides satisfying crunch to contrast the silky tuna topping. Transfer the fried rice to a wire rack lined with paper towels to drain excess oil and maintain crispness.
Step 4: Assemble Your Spicy Tuna Crispy Rice
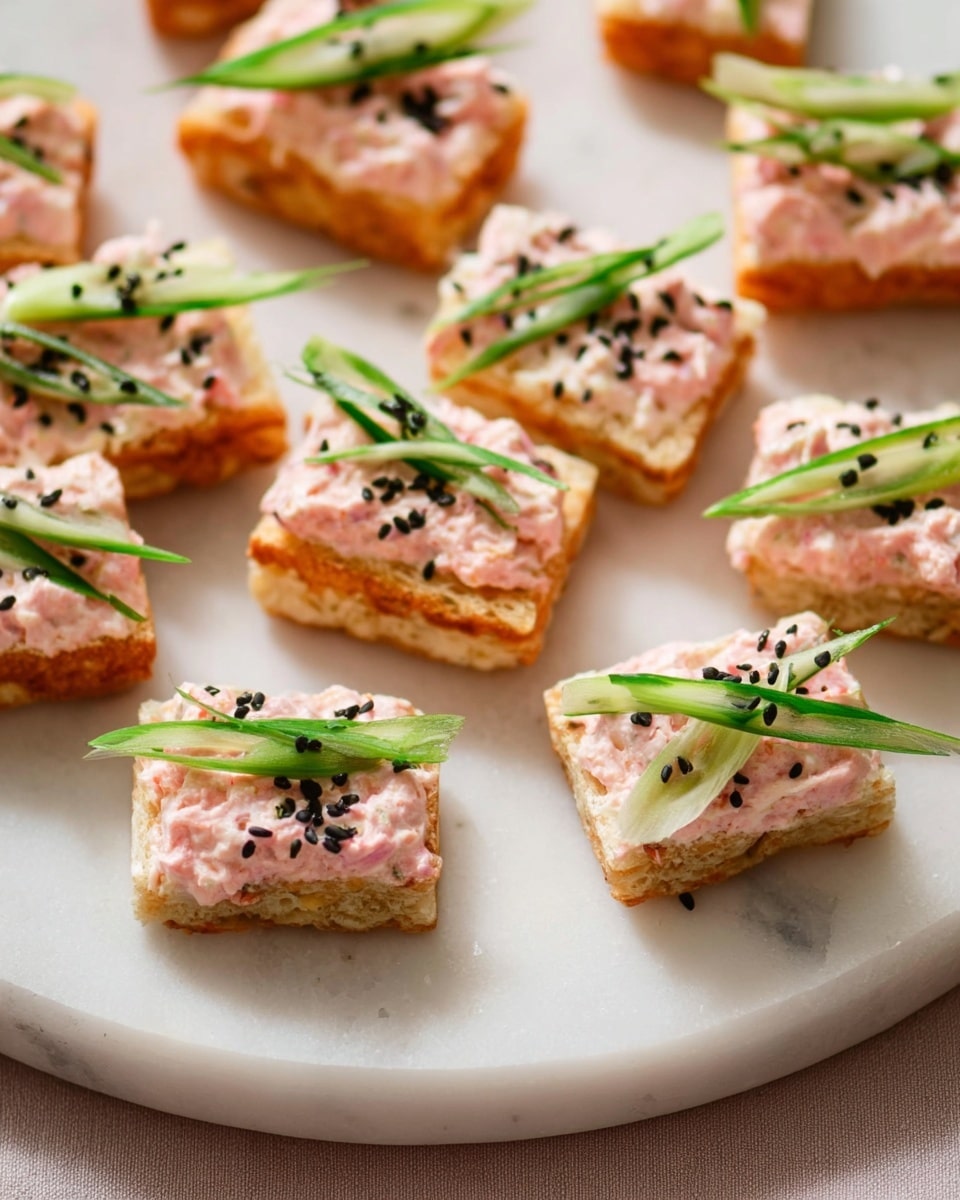
Now comes the fun part: plating these bad boys! Spoon a heaping tablespoon of the spicy tuna mixture atop each crispy rice square. Garnish with a sprinkle of black sesame seeds and a thin slice of jalapeño to amp up that vibrant heat and add visual flair. For an extra touch of decadence, drizzle a little more spicy mayo over the top. Serve immediately to enjoy the interplay of hot, crispy rice and cool, creamy tuna in each bite.
How to Serve Restaurant-Worthy Spicy Tuna Crispy Rice At Home! Recipe

Garnishes
The finishing touches help elevate your dish from delicious to utterly memorable. Use thin slices of fresh jalapeño to add a bright and crisp heat, and sprinkle black sesame seeds for nuttiness and visual contrast. You can also add tiny dots of extra spicy mayo around the plate or a sprinkle of microgreens for an elegant presentation.
Side Dishes
Pair this dish with light, refreshing sides to balance richness. A simple seaweed salad or cucumber sunomono with a ginger vinaigrette complements the spicy tuna perfectly. Alternatively, some pickled ginger offers a palate-cleansing bite that keeps the flavors lively and fresh throughout your meal.
Creative Ways to Present
Serve these spicy tuna crispy rice bites as an impressive appetizer spread or as part of a sushi night platter. Arrange them on a sleek slate board for a restaurant-style presentation or stack them in neat rows on a wooden serving board for a casual gathering. Play with garnishes like edible flowers or thin lemon zest strips to add unexpected aroma and color.
Make Ahead and Storage
Storing Leftovers
If you have any leftovers, keep the spicy tuna mixture and crispy rice separately in airtight containers in the refrigerator. This helps maintain the fry’s crunch and preserves the freshness of the tuna. Store the mixture for up to 24 hours to ensure the best quality and food safety.
Freezing
While the spicy tuna mixture is best fresh, you can freeze the cooked rice if needed. Freeze the shaped rice squares on a baking sheet first, then transfer them to a freezer-safe container. Thaw in the refrigerator and refry to restore crispiness. Note that freezing and thawing can slightly alter the texture.
Reheating
To reheat the crispy rice, gently pan-fry again in a little oil over medium heat until crisp and warmed through. Avoid microwaving as it tends to make the rice soggy. Assemble with fresh spicy tuna just before serving for the ultimate taste experience.
FAQs
Can I use other types of fish instead of ahi tuna?
Absolutely! Sushi-grade salmon or yellowtail can work beautifully as alternatives. Just ensure the fish is very fresh and from a reputable source to maintain the best texture and safety.
What if I don’t have Kewpie mayonnaise?
Regular mayonnaise can substitute in a pinch, but Kewpie mayo has a unique creaminess and slight sweetness that really enhances the spicy tuna. You can mix regular mayo with a tiny bit of rice vinegar to mimic that flavor.
Is it necessary to refrigerate the rice overnight?
Refrigerating the rice for at least 3 hours firms it up, making it easier to cut and fry without falling apart. While overnight is ideal, a few hours of chilling will still work well.
How spicy is this recipe? Can I adjust the heat?
This recipe has a balanced kick from Sriracha and fresh jalapeños, but you can adjust the heat by varying the amount of Sriracha or removing jalapeño seeds. For milder versions, reduce or omit the chili ingredients.
Can this dish be made gluten-free?
Yes! Make sure you use gluten-free ponzu and Sriracha brands. Most rice vinegars and sushi rice are naturally gluten-free, making this dish a great option for gluten-sensitive folks.
Final Thoughts
Making this Restaurant-Worthy Spicy Tuna Crispy Rice At Home! Recipe is such a rewarding experience because it delivers a dazzling mix of textures and flavors that really impress. It’s easier than you think to create something that tastes like it came from your favorite sushi spot without leaving your kitchen. Don’t hesitate to dive in and share these crispy bites with loved ones—you’ll be amazed at how quickly they disappear!
PrintRestaurant-Worthy Spicy Tuna Crispy Rice At Home! Recipe
Recreate the restaurant-quality spicy tuna crispy rice right in your kitchen with this detailed recipe. Featuring perfectly seasoned sushi rice fried to golden crispness, topped with a creamy, spicy tuna mixture enhanced by Kewpie mayo, Sriracha, and ponzu sauce. A perfect appetizer or snack combining textures and bold flavors.
- Prep Time: 10 minutes
- Cook Time: 15 minutes
- Total Time: 9 hours 40 minutes
- Yield: 4 servings
- Category: Appetizer
- Method: Frying
- Cuisine: Japanese
Ingredients
Rice and Seasoning
- 1 cup sushi rice (or other short grain rice)
- 2 Tbsp rice vinegar
- 1½ tsp granulated sugar
- ½ tsp Kosher salt
- ½ cup grapeseed oil (or other neutral oil, for pan frying)
Spicy Tuna Topping
- ½ lb sushi-grade ahi tuna
- 3 scallions (thinly sliced)
- 1 jalapeño (thinly sliced, for serving)
- black sesame seeds (for serving)
- ½ cup Kewpie mayonnaise
- ¼ cup Sriracha
- 3 Tbsp ponzu sauce
Instructions
- Cook the sushi rice: Rinse 1 cup of sushi rice under cold water until clear, then cook according to package directions or in a rice cooker. Let the rice cool slightly.
- Prepare the sushi vinegar: In a small saucepan, combine 2 Tbsp rice vinegar, 1½ tsp sugar, and ½ tsp Kosher salt. Heat over medium-high until simmering, whisk until dissolved, then set aside.
- Season the rice: While the rice is still warm, gently fold in the sushi vinegar using a rice paddle or spatula, carefully not mashing the grains.
- Chill and shape the rice: Line a small quarter sheet pan or rectangular container with plastic wrap. Press the seasoned rice to an even ½-inch thickness. Cover and refrigerate at least 3 hours or overnight until firm.
- Prepare the tuna: Finely dice the sushi-grade ahi tuna, then chop further until very small pieces form. Place in a bowl with 3 thinly sliced scallions.
- Make spicy tuna mixture: In another bowl, whisk together ½ cup Kewpie mayonnaise, ¼ cup Sriracha, and 3 Tbsp ponzu sauce. Combine this with the chopped tuna and scallions. Cover and refrigerate until ready.
- Fry the crispy rice: Heat ½ cup neutral oil in a large skillet over medium heat. Cut chilled rice into 2-inch by ¾-inch rectangles using wet hands or a wet knife to prevent sticking. Fry 7-8 pieces at a time for about 2 minutes per side until golden and crispy. Drain on a wire rack lined with paper towels. Add oil as needed between batches.
- Assemble and serve: Spoon about 1 heaping tablespoon of the spicy tuna mixture on each crispy rice piece. Garnish with black sesame seeds and a thin slice of jalapeño. Serve immediately, optionally drizzling extra spicy mayo.
Notes
- For best results, use sushi-grade ahi tuna to ensure freshness and safety when consuming raw fish.
- Make the sushi rice at least a day ahead to allow flavors to meld and rice to chill thoroughly, aiding in shaping and frying.
- If you don’t have grapeseed oil, other neutral oils like canola or vegetable oil work well for frying.
- The spicy tuna mixture can be adjusted in heat by modifying the amount of Sriracha according to your preference.
- Use Kewpie mayonnaise for its creamier texture and slight sweetness, but regular Japanese mayonnaise can substitute if unavailable.
- Do not overcrowd the pan when frying to maintain oil temperature and crispiness.


